How to Import Bins in OMS
Setting up bin locations is an essential part of warehouse and inventory management. When dealing with a large number of storage bins, manually creating each one can be time-consuming. That's where the Import Bin feature in BetterCommerce OMS becomes valuable. It allows you to upload multiple bins in bulk using a standardized Excel template.
What Is Bin Import?
Bin Import is a feature that allows you to upload bin location data in bulk. Bins represent physical or logical storage areas within a delivery center or warehouse, and importing them via Excel saves time and ensures consistency across your system.
Steps to Import Bins in OMS
-
Navigate to Delivery Centers
Go to the Delivery Centers module in OMS.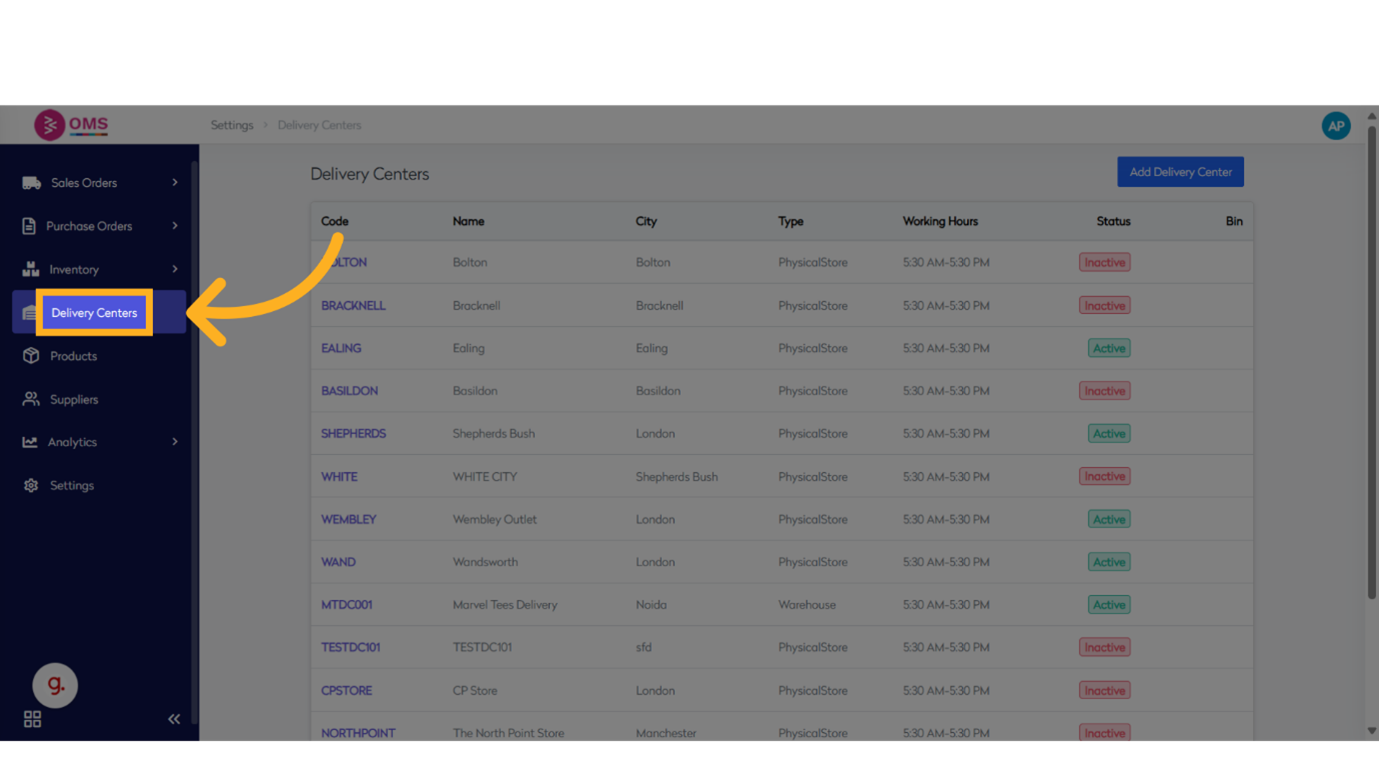
-
Select a Delivery Center
Choose the location (e.g., warehouse or store) where you want to create bins.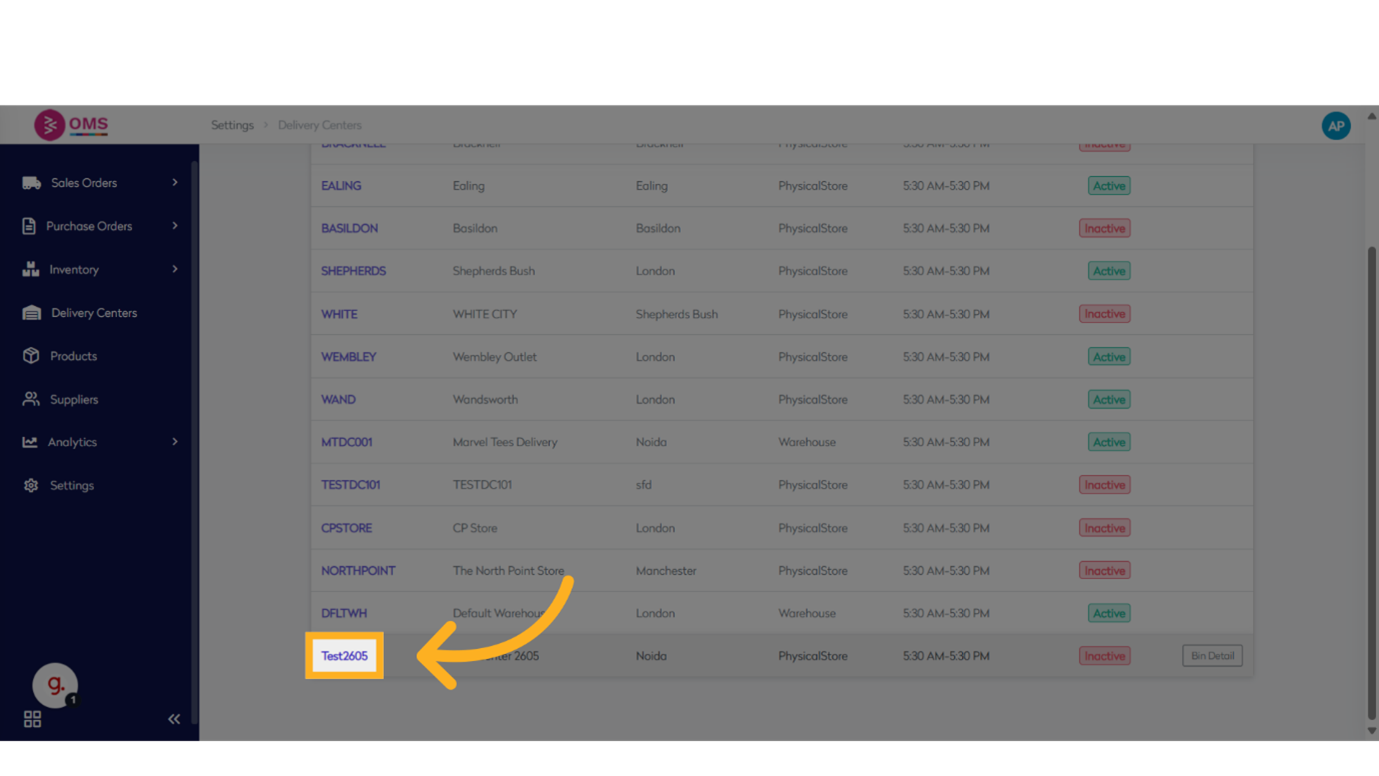
-
Click “View All Bins”
This will open the current list of bins under that delivery center.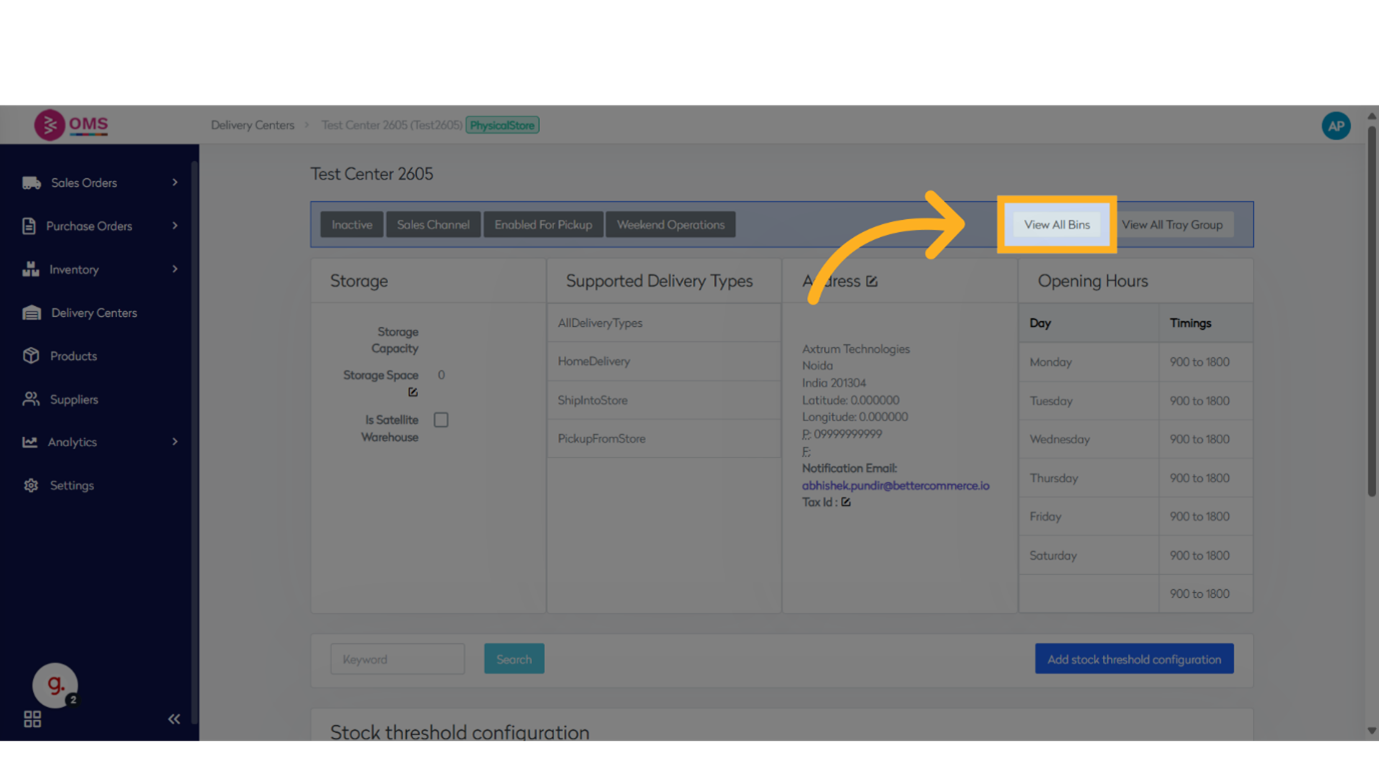
-
Click “Import Bins”
Click on ** Import Bins**.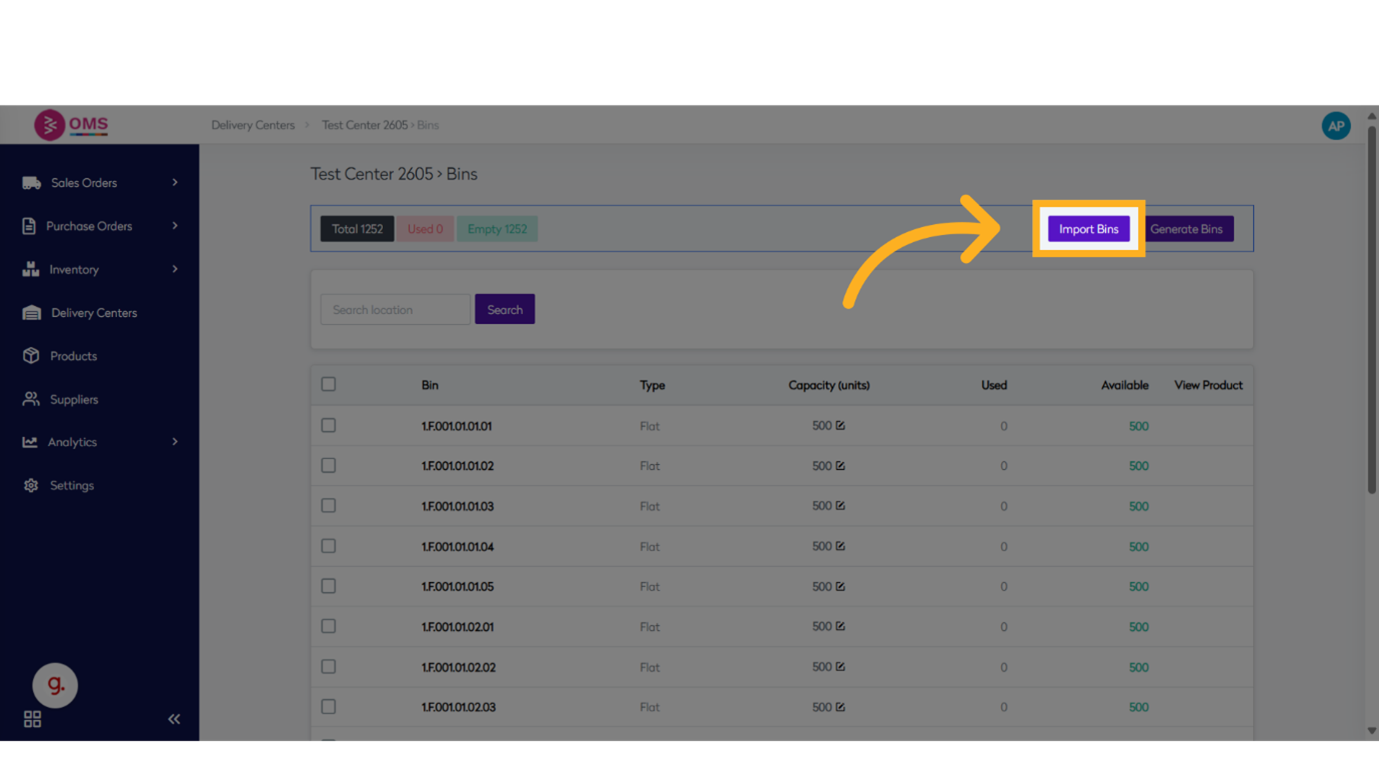
-
Download the Excel Template
Click Download Excel to get the standard import template.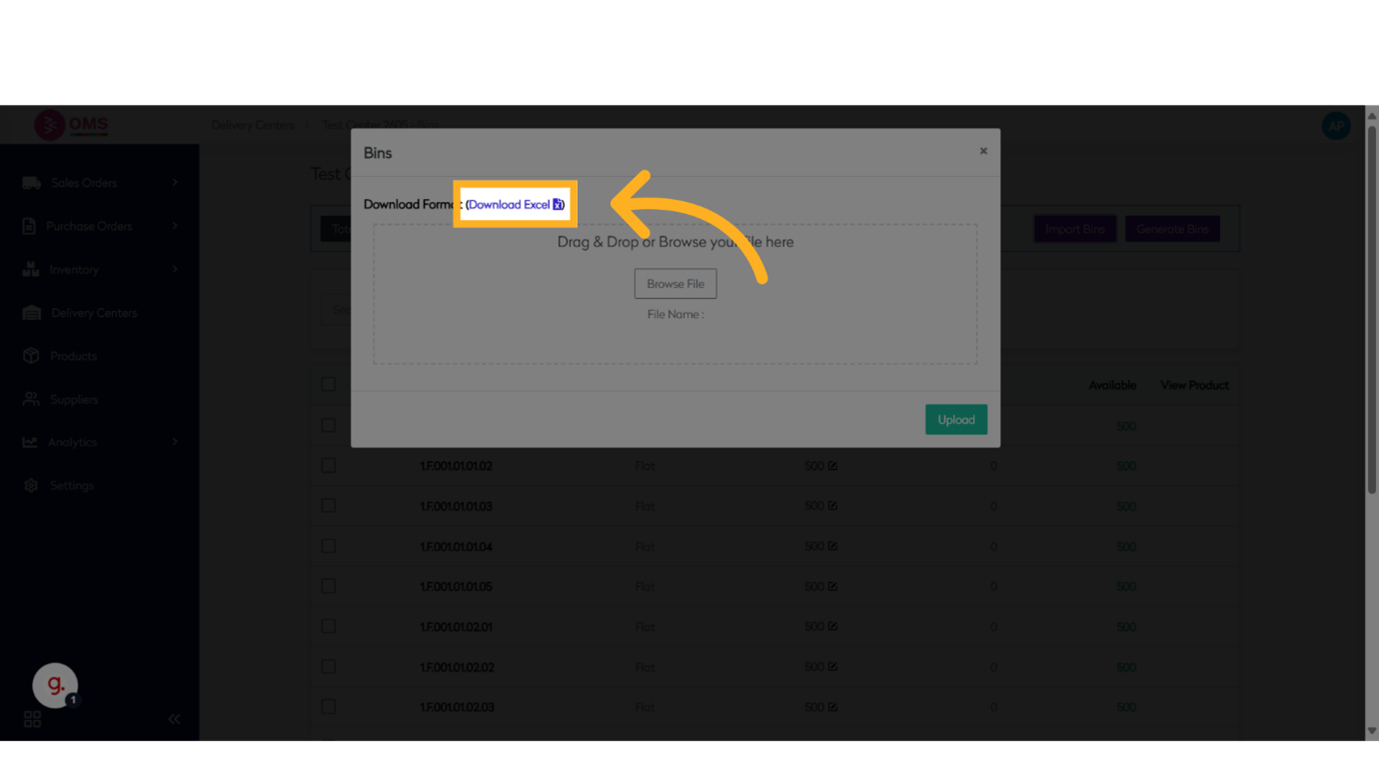
-
Fill the Template
Open the downloaded Excel file and enter bin details.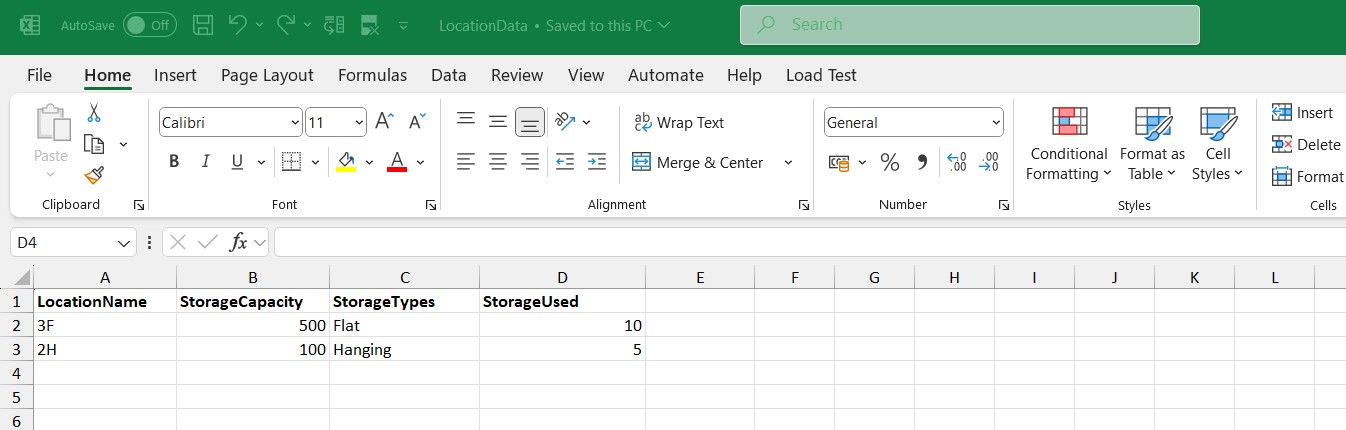
-
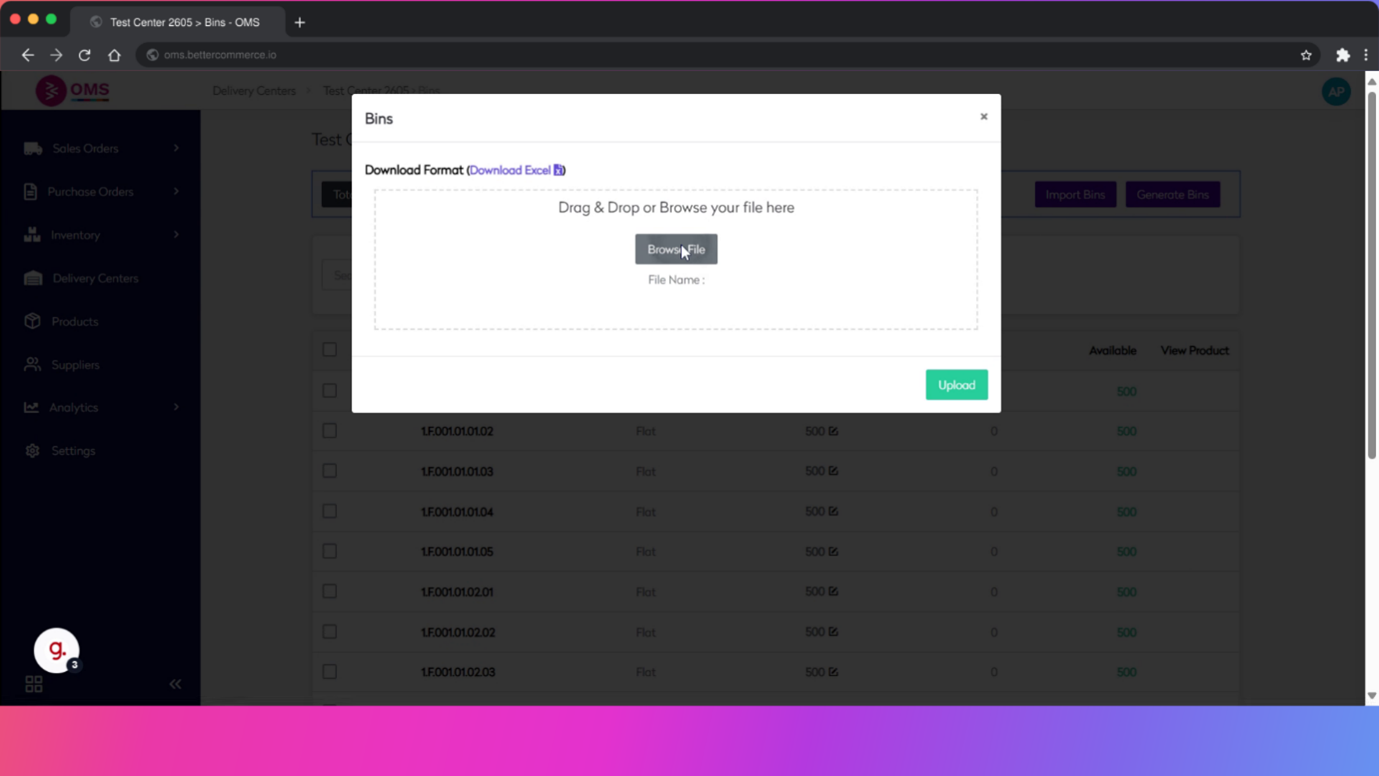
Upload the File
- Return to the Import Bin screen
- Click Browse File or drag the completed Excel sheet
- Select the file from your system
-
Click Upload
Once the file is selected, click Upload. The system will begin processing and importing the bins.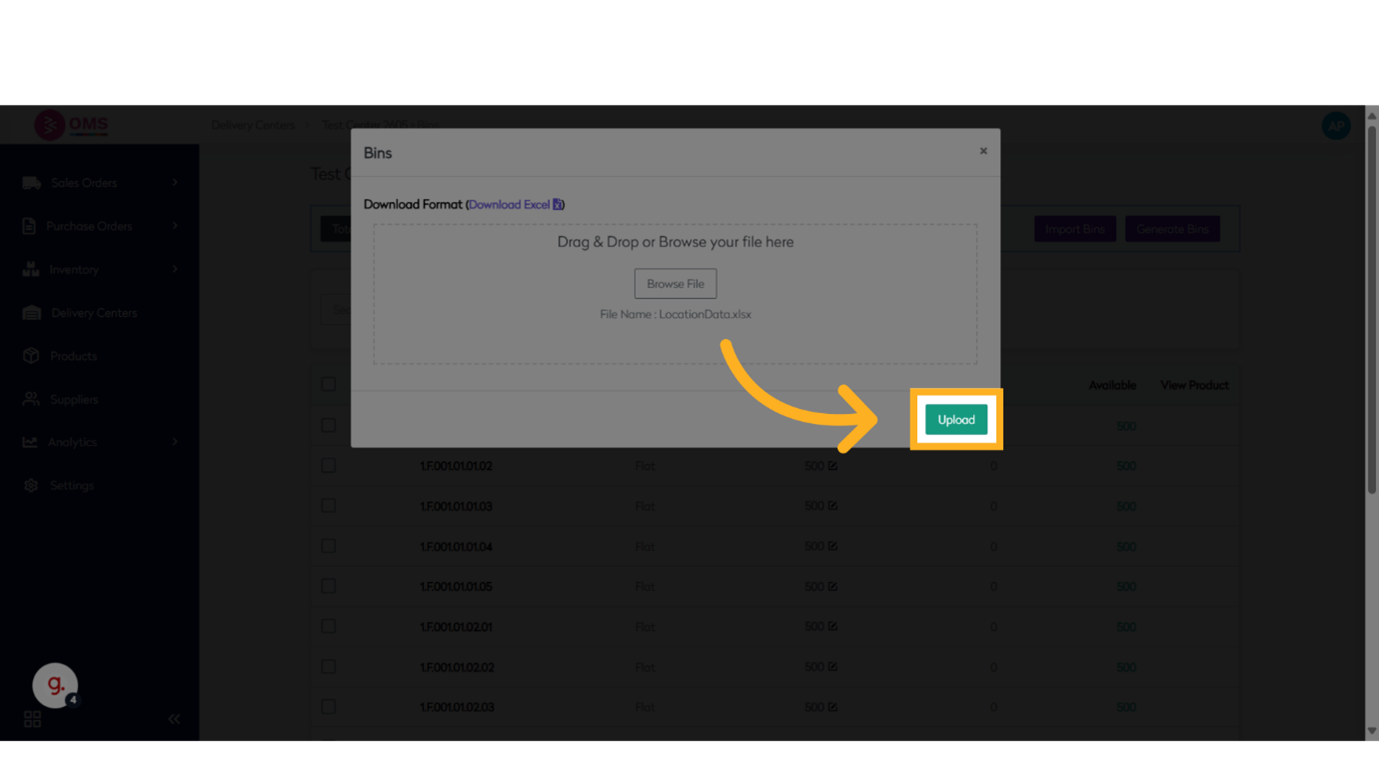
Best Practices
- Always use the official OMS template
- Double-check bin codes for duplicates
- Maintain a consistent bin naming convention
- Use batch uploads during warehouse setup or restructuring
- Keep a backup of your import file
Summary
Importing bins in BetterCommerce OMS is the fastest way to create and manage hundreds of bin locations. It supports structured warehouse operations, improves inventory visibility, and saves significant time during initial setup or reconfiguration.
Bulk import, better control — streamline warehouse setup with Bin Import in OMS.